Newspaper clipping about the events. Tricky Ways to Use Old Magazines Alternately
Surely, many of us wanted to transform our interior more than once, but somehow we didn’t raise our hand to lay out an impressive amount for a designer item.
Do not despair, because you can make a spectacular decor element yourself from ... old magazines. Tricky ways to alternatively use unwanted glossy waste paper will help you make something special with your own hands.

1. Photo frame

The rolled pages of glossy magazines and catalogs can be used to create and decorate photo frames and mirrors. New colorful frames are perfect for children's pictures and wall decor.
2. Flower pot

With the help of magazine pages, nondescript flower pots can be updated. To do this, the pages need to be twisted into tight tubes and glued around the perimeter of the pot.
3. Desktop stand

Simple manipulations with scissors and glue will help turn an old magazine into an original stationery stand.
4. Finishing material

Magazine pages can be used as a full-fledged finishing material for walls. True, the finishing process is quite painstaking and will take a lot of time. To implement this idea, the pages need to be twisted into tight tubes and glued to the wall one by one. The result of the work will be an accent wall with a unique texture and pattern.
5. Organizer

An original stationery organizer woven from magazine pages twisted into thin tubes.
6. Animal figurines

Figurines of dogs glued together from magazine pages twisted into tubes. Such crafts can become sources of real income, because on the Internet their price reaches $ 200.
7. Handbag

A lady's bag that each of the dense glossy pages folded into long strips can weave.
8. Coffee table

Made from a stack of rolled magazines and a round glass top, this coffee table is a stylish addition to any living room.
9. Dishes and coasters

Magazine pages rolled into thin tubes can be used to create unusual plates and coasters. The only drawback of such crafts is that the paper does not tolerate moisture well. Therefore, in order for the products to last longer, cover them with a thick layer of glue or other protective coating.
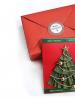
10. Christmas decorations

Instead of just throwing away an impressive collection of gloss, use it to create original Christmas decorations. This way you can get a lot of Christmas balls without spending a dime on it.
11. Panel

Creativity and a little diligence will allow you to turn the pages of old magazines into unusual wall panels.
12. Baskets

If your magazine collection is large enough, use them to create colorful and practical baskets. Finished products can be used to store clothes and other small things.
Video bonus:
13. Stools

Low stools made with only stacks of magazines, old belts and soft cushions.
14. Vase

A stunning vase that can be made with a stack of magazines and glue on hand. To create this masterpiece, the pages of magazines need to be folded into strips, and the strips must be carefully twisted into three-dimensional circles, fixing with glue. When the glue dries, mugs of different sizes must be glued together using a suitable form.
15. Clock

A bright clock made from the pages of glossy publications, twisted into voluminous circles, will become a spectacular detail and a wonderful decoration of one of the walls of the apartment.
16. Volumetric letter

From magazine pages, you can make large three-dimensional letters, which are now widely used for decoration. To do this, the pages need to be folded into thin tubes, fixed with glue and glued to a letter cut in advance from thick cardboard.
17. Lamps

Magazine pages perfectly transmit light, so they can be used to create original lampshades for lamps.
18. Casket

Thick pages of magazines are perfect for creating an original box in which you can store hairpins and jewelry.
19. Framed covers

Some of the covers are so beautiful that it's a pity to even throw them away. Such samples can be put in laconic frames and used to decorate walls.
We are celebrating cleaning day! We ruthlessly throw away everything that clutters up your space, easily part with old things, take out clothes that have not been worn for more than a year to the trash. Determined, bold, tough. Something new, good, bright and cool can only come where there is a place for it, so remember: the more you release, the more you get. However, it may not be worth throwing everything away at once: old magazines, for example, is a great opportunity to create something new. Ideas and options - a lot! Crafts from old magazines interesting and unconventional. It is not at all necessary to make Soviet curtains for the kitchen - believe me, you can come up with something interesting and cool so much that it will drag you in and create a precedent for new and new projects. So, ? Let's figure it out together.
What to do with old magazines - 5 master classes:
1. Candy plate

Oh, how nice it is when there is a full vase of sweets on the table! Their mere presence is uplifting. You can even not eat at all - just admire, this is already enough to make your soul warm and sweet. By the way, a handmade plate from old magazines, which looks stylish and interesting, very well increases the degree of this sweet joy.
2. Decoration on the door

A thing, frankly, of dubious functionality. But cool! Decorate the door with such a trinket - and immediately the mood will rise, jump up, improve and just smile. After all, not everything in life has to be practical and functional, right? You can sometimes indulge in nonsense!
3. Wall panel

Wall panel from old magazines? Why not? It will definitely turn out interesting and cool! You can arrange in the form of meaningful words, you can make a collage of pictures, you can, in the end, just depict an abstraction using color spots! The key one: to create, having fun, to create, not embarrassed and not afraid!
4. Garland from old magazines

Well, yes, not the most durable option - this is a one-day garland: I did it for some reason, decorated the room and took it off after a couple of days. But the transience of her life in no way detracts from the merits: it is done easily, it turns out joyful, it performs its function at 100%. What else do you need from a homemade garland?
Newspaper tube weaving is based on traditional wicker weaving. Currently, it has gained great popularity, because this material is always at hand, and by connecting fantasy, you can create beautiful crafts from newspaper tubes. Master classes on creating crafts for beginners will help with this. After the hand is “full”, you can start creating more complex products.
Clean printing paper is best for weaving. It is soft and spreads evenly. If it is not possible to find such paper, then to create original crafts from newspaper tubes, sheets of ordinary newspapers can be used. You can work with office paper, but it is quite thick, and this is inconvenient.
Basket
- newspaper or magazine sheets;
- cardboard;
- knitting needle or wooden skewer;
- PVA glue;
- scissors;
- ruler;
- tassel;
- pencil.
Cut the newspaper into squares measuring 10 by 10 centimeters (longer tubes will require larger squares).

Put the needle on the corner of the sheet and wrap the paper around it tightly. Pull out the pin. To prevent the tube from unwinding, smear the edge of the newspaper with glue before twisting. Carry out such an operation with all sheets of the newspaper.

From cardboard, cut 2 identical circles for the base of the basket. The volume of future crafts depends on the diameter of the circles.

Glue 8 newspaper sticks onto one cardboard circle as shown in the photo.

Glue the second circle on top. For 10-20 minutes, this workpiece should be put under the press.


After that comes the most important stage - weaving. It is necessary to lift one tube from the workpiece vertically and glue the tube horizontally to it, as shown in the photo.

This tube must be brought behind the nearby frame vine so that it bypasses it from the outside, and the next tube from the inside. If the vine with which we braid ends, then we take another tube and, as it were, screw it into the edge of the last vine, and continue to weave.

Covering the frame tubes from the outside, and then inside, weave all the rows until the desired height of the basket is obtained.

When the last row is made, cut the tube of the vine obliquely, smear its edge with glue and bring it inside the basket to the limit. Cut the frame tubes too, grease with glue and fill the crafts inside.

To make a handle, you need to weave 2 tubes with a bundle. So that they do not unravel, it is better to glue them. Bring the edges of the handle inside the basket and grab it with glue.

If desired, a finished basket of newspaper tubes can be painted, decorated with decorative flowers, beads, decoupage.
Hat
Required materials and tools:
- newspapers;
- scissors;
- glue;
- Bowl.
Make 10 long newspaper tubes (you can see how to make them in the previous master class).

Fold 8 tubes crosswise, as in the photo.

Connect the remaining 2 tubes to each other and lead them over a horizontally lying stack.

Weaving is carried out immediately with 2 tubes using the “rope” technique. Bring one tube under the base of the hat, the other - from above, cross each other. Do this with all ends of the base cross.

Weave the second circle with the same technique.

On the third circle, braid each base vine with a “string”, dividing them among themselves.

To make the hat even and neat, we apply the weave to the convex bottom of the bowl and use it as a shape.

For convenience, we fix the vines with clothespins over the edges of the bowl. So they will not get confused and interfere.

Continue weaving until the hat is deep enough.

Remove the bowl and start weaving the brim of the hat.

Cut the vine that was woven and bring its edges inside the craft.

Take a new tube and thread it into the loops near the base vines, as shown in the photo.

Do this with each base vine, inserting new tubes into the loops next to it.

To weave the fields, you will need one vine, which will braid each tube with a "rope" technique.


Weave until the margins are wide enough.

After that, bring all the remaining base vines inside the crafts and fill them into the cells.

Cut off unwanted ends with scissors or wire cutters.

You can decorate the hat with acrylic paints, decorate with artificial flowers, ribbons.


Fungus
Required materials and tools:
- newspapers;
- wire;
- scissors;
- glue;
- Bowl.

For the base you need 8 newspaper tubes. In order for the fungus to keep its shape well, a thin wire is inserted into the tubes. From them, make the base in the shape of a square, as shown in the photo.
To make the base for the fungus neat and convex, you need to place it on a small bowl. Continue braiding the vines further, but now sticking to the shape of the bowl.
After the mushroom cap is ready, remove the bowl. Bend the tubes in such a way that a leg is obtained.
Braid the inside of the mushroom and go out on the leg, as shown in the photo. At this stage, the leg should be slightly widened so that it does not turn out to be straight.
The wire at the base of the tubes will not allow the craft to unravel, so the edges of the tubes can simply be wrapped inside the fungus.
To decorate the fungus, you need to paint its leg with white paint and the hat with brown. After the whole craft must be covered with a colorless varnish.
panel
Crafts from newspaper tubes with your own hands are a great way to decorate the interior. Exclusive option - panel.
Required materials and tools:
- newspaper sheets;
- PVA glue;
- brush for glue;
- knitting needle or skewer made of wood;
- acrylic or food paints;
- office rubber bands;
- scissors;
- strong threads;
- needle.
Progress:

Bast shoes
Souvenir bast shoes can be made from newspaper tubes, which are considered a family talisman, a symbol of longevity and health.
Required materials and tools:
- sheets of newspapers or magazines;
- PVA glue;
- brush for glue;
- knitting needle or skewer made of wood;
- acrylic or food paints;
- stationery knife;
- scissors;
- linen thread.
Progress:
- Spread the sheets of newspaper across the long side, bend in half and cut with a clerical knife.
- Wind the resulting sheet onto a pencil diagonally from the right corner so that one edge is slightly wider than the other. Lubricate the edge of the sheet with a small amount of glue so that the tube does not unwind.

- Insert three tubes into each other, fixing with glue. Such long tubes need 5 pieces.

- Place the tubes according to the photo and start weaving, taking into account that the right or left product is planned.

- At the end of weaving, thread the end of the tube with a knitting needle along the entire length of the sole.
- After the bast shoes are ready, you can paint them with a water-based stain "Oak", and then apply acrylic paint white color. The paint is applied with a semi-dry brush in random strokes, creating the effect of antiquity.

- When the paint is completely dry, coat the product with a primer. To do this, mix PVA glue with water in a ratio of 3 to 2. This will make the bast shoes strong.
- To decorate the bast shoes, it is enough to use linen thread, wrap the edges of the bast shoes with it, creating the effect of antiquity.


Frame
Another way to use newspaper tubes is to make crafts and decorations from twisted spirals, such as creating an original photo frame.
Required materials and tools:

- sheets of newspapers or magazines;
- PVA glue;
- tassel;
- knitting needle or skewer made of wood;
- acrylic paints;
- scissors;
- white sheet of paper;
- cardboard.
Progress:

Wood
An original way to use newspaper tubes is to create an unusual interior tree.
Required materials and tools:
- sheets of newspapers or magazines;
- PVA glue;
- tassel;
- knitting needle or skewer made of wood;
- acrylic or gouache paints;
- scissors;
Progress:
- Prepare tubes.

- Fasten 13-15 tubes together, wrapping them with a thread and a strip of paper smeared with glue. Thus, a tree trunk is formed.

- With the next tube, smeared with glue, wrap the formed trunk in a spiral to the required height. If the tube ends, insert the next one into it and continue weaving.

- Divide the trunk into 2 unequal parts, forming branches. Wrap each branch with a tube smeared with glue.


- Separate the branches again and wrap them around. Continue dividing until 1 tube remains in each branch.

- Trim the last branches to the desired length and form curls.

- Wrap the lower part of the trunk with another layer of tubes, slightly thickening it.

- Cover the finished tree with a mixture of PVA glue and gouache.

- After the glue has dried, varnish the product and decorate.

Box
Required materials and tools:

- sheets of newspapers or magazines;
- PVA glue;
- felt-tip pen;
- knitting needle or skewer made of wood;
- scissors;
- dye.
Progress:
- Prepare tubes and a box of a suitable shape, which will be braided during work.


- To begin with, form the frame of the future product. To do this, at the bottom of the box, mark the places where the main tubes pass, given that the more often they are located, the denser and stronger the weaving will be. There should also be warp tubes at the corners of the box.
- Glue the tubes according to the markup.

- Start weaving the walls of the box. To do this, glue an additional tube to the base tube, which will be used for weaving. Braid the tubes of the base in the classic way: the first outside, the second inside, the third outside, and so on.

- In this way, braid the box completely. If the working tube ends, it is “built up” by inserting an additional one into it, smearing the edge with a small amount of glue.


- At the end of the work, cut off the edge of the working tube at an angle of 45 degrees and hide it inside the product. The main tubes are also cut off and brought inside, fixed with a small amount of glue.

- Paint the finished box with acrylic or water-based spray paints.

- After the paint has completely dried, decorate the product using satin ribbons, artificial flowers and beads.
Egg
Required materials and tools:
- sheets of newspapers or magazines;
- PVA glue;
- knitting needle or skewer made of wood;
- scissors;
- dye.
Progress:
- Prepare tubes from newspapers.
- Put three tubes crosswise, fixing the place of intersection with a drop of glue.

- At the intersection, glue the fourth tube and start weaving. Bend one tube over 2 others, take the next one and bend over the other two in the same way, then the next one and so on.


A cup
Required materials and tools:
- sheets of newspapers or magazines;
- PVA glue;
- knitting needle or skewer made of wood;
- scissors;
- dye.
Progress:

Flowers
Required materials and tools:
- sheets of newspapers or magazines;
- PVA glue;
- knitting needle or skewer made of wood;
- wire;
- wrapping;
- scissors;
- dye.
Progress:
- Prepare tubes from newspapers, color them yellow, green and Brown color wait for complete drying.

- Insert a wire into 3 short yellow tubes and wind a non-wooden skewer in turn, forming spirals. These will be the pistils of the flower.

- Take 2 more yellow tubes. Bend one of them in half, and wrap the second with a loop around the first and begin to braid without tightening. This will be the first petal. Also weave 2 more yellow and 3 brown petals.


- Similarly, make leaves from green tubules, only with a sharper bend.


- When all the blanks are ready, collect the flower. Fasten pestles together with wire. Attach brown petals around the pistil with a second layer, and then yellow ones. Attach a stem of 3 green tubules to the flower head with a wire.


- Wrap the stem with wire for strength. In the process of wrapping, attach a leaf.


- To hide the attachment points and wire, wrap the stem with wrapping paper.

- The flower is ready, if desired, it can be varnished.

Heart
Necessary materials and tools
- sheets of newspapers or magazines;
- glue Moment;
- knitting needle or skewer made of wood;
- wire;
- scissors;
- dye.
Progress:

You can make a lot of crafts.
And if the house is filled with newspapers and / or magazines, then even better, because. You also save on paper.
From this material you can make very beautiful products.
Here is just a small part of what can be done from newspapers and magazines.
Works from newspapers: wall clock
You can make this decoration without using a clockwork - you get a beautiful decoration for your home, reminiscent of the sun.
You will need:
Approximately 24 newspaper or magazine sheets
Pencil or pen (to make it easier to twist the tubes)
Scissors
long needle
Two plastic discs (similar to those that protect a large CD case)
* disks can be replaced with colored cardboard of any color.
Cardboard in the shape of a circle with a hole in the middle (optional)
Battery powered clockwork (optional)


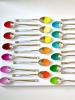
Crafts from newspapers with your own hands: the project "Butterfly"

You will need:
Newspaper or unwanted magazine
Butterfly stencil
Double sided foam tape
Matte cardboard
* You can make butterflies in several sizes and shapes.
* If you want to make a butterfly of the same shape and size, then you can use one stencil or buy a shaped hole punch.


1. Prepare the stencil.
2. Using a stencil, draw butterflies on different sheets of a magazine or newspaper. You can draw a butterfly on one sheet, put several sheets together and cut out several butterflies at once.

3. Cut out the butterflies.
* Each sheet can be cut into wide strips, which can be folded together, drawn on one strip of 2-3 butterflies of different sizes and cut out several at once.
4. As you cut out the paper butterflies, carefully fold them on a flat surface. You can lay them out depending on the color scheme and / or size (shape).

5. Attach double-sided foam tape to each butterfly. You can bend the wings of the butterflies a little. Also try to make several layers of double tape so that the butterflies "fly" at different levels.
6. Prepare matte cardboard. For convenience, you can mark with a pencil the places where you will stick your paper butterflies.

* Choose the right background for your composition.
7. Insert the cardboard into the frame. You can pull the glass out of the frame if it interferes.


Newspaper bracelet (master class)

You will need:
Newspapers or magazines
Scissors
1. Cut out 10 cm x 4 cm rectangles.

2. Bend each rectangle in half in length and straighten.

3. On the left and right, bend the ends to the fold line.
4. Fold in half again to make a long thin strip.

5. Fold the strip in half widthwise and unfold it.

6. Fold the left and right halves in half so that they meet at the fold line.

7. Fold the figure in half again to make the letter V.

* In a similar way, you need to fold several rectangles.
8. To start folding the bracelet, you need to connect all the details. Start putting the ears of one figure into the ears of the other until you have 27 links in the chain. You need 3 chains in total.

9. Connect the chains using several blanks (V shape).

How to make a paper chain:
Newspaper Crafts for Beginners: Newspaper Vase and Stand

You will need:
Glue or glue stick
Scissors
Newspapers or magazines
1. Cut each sheet of newsprint or magazine paper into 4 vertical strips as shown. Choose the length of the strips yourself.

2. Fold each strip in half, securing it inside with glue.

3. Now fold the strips in half again, and secure with glue again.

4. Start twisting the strips. This must be done tightly. After a few strokes, apply a drop of glue.

5. In order to make the base of the vase, you need to twist both several small spirals and one large one. In this example, the second option (large spiral) is used.

Glue several strips together to get one long strip, which then needs to be twisted into a large spiral. If your base isn't big enough, just glue as many strips to it as you need and add them to the spiral.

6. Begin to glue all the small spirals together, thereby collecting a vase.
* You can make a stand for a cup or teapot in the same way.


We decorate the suitcase with newspapers and magazines

You will need:
old suitcase
tassel
Magazines
PVA glue, and even better glue for decoupage
Scissors or utility knife

1. Cut out the images you like from your favorite magazines, which will then decorate your suitcase.
2. Apply glue to the suitcase and start carefully laying out magazine excerpts on it.
3. Reapply glue over the glued pages.
4. Decorate the entire suitcase in this way.
5. Using scissors or a clerical knife, carefully cut off the excess parts so that everything is straight.
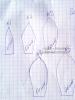
Newspaper item: bouquet of roses

You will need:
Scissors
Glue gun with hot glue (you can try superglue / Moment glue)
flower wire

1. Cut out a circle with a diameter of about 10 cm from a sheet of newspaper.
2. Cut a spiral from the circle, about 2.5-3 cm wide.

3. From the outer end of the spiral, start twisting the paper until you reach the center.

4. Let the twisted flower "bloom" a little - lower the spiral.

5. Fix the flower with hot glue.

6. Prepare flower wire, bend one of the ends and glue to the flower. The end of the wire can be covered with a piece of newspaper.


7. Make a few flowers to make a lush bouquet.
8. Connect all the flowers in a bouquet and secure the stems with wire. If the stems are too long, you can shorten them with scissors.

9. Wrap the stems with pretty ribbon and secure the ribbon with glue.

Surely, many of us have old magazines that have already been read and re-read more than once, but the hand does not rise to throw them away. Almost everyone subscribes to newspapers, which then turn into huge piles of waste paper.
And, of course, we all get free flyers out of our mailboxes. Do not rush to get rid of this "wealth": you still need it. See what an unusual and, most importantly, beautiful do-it-yourself decor from unnecessary newspapers and magazines you can make. These cheerful and fun crafts from magazines are sure to decorate your home. What can be done from magazines with your own hands - now we'll figure it out.


What is needed for this?
What attracts this way of decor? Firstly, it is easy to perform: you do not need any special skills, surrender to the will of your imagination. Secondly, it does not take up much space and time. Thirdly, you can involve the whole family in such funny handicraft and have fun and exciting time. So here's what you need to know:
Scissors;
PVA glue and glue stick;
Ruler, pencil;
A thin bamboo stick or knitting needle (we will wind paper tubes on it);
The surface you are going to decorate.
Surely, you have noticed that the decor from old newspapers and magazines is based on the use of the same blanks - newspaper and magazine tubes and strips rolled up by a snail. By varying their size and color, you can create interesting compositions and transform ordinary or already boring things - photo frames, mirrors, wall clocks, vases, floor lamps, candlesticks and all kinds of boxes for storing a thousand and one little things. In such an original way, you can arrange gift wrapping or make a panel on the wall. So, let's learn how to make these blanks.
Newspaper and magazine tubes
1. Take a sheet of paper and fold it in half, smooth the fold well with scissors.
2. Place a bamboo stick or a knitting needle diagonally (the size of your future workpiece depends on its diameter) and start winding the tube carefully and tightly. After several layers, coat the remaining sheet with glue. It should not be too liquid (it is better to take a glue stick). After you get the tube of the diameter you need, carefully remove the stick.
3. Done! Now it remains to dry it and create masterpieces .


You can use these newspaper tubes in their original round form. Cut them into pieces of the length you need and glue them end to end. Do not feel sorry for the glue, they should be well fixed. If you don't want to get your hands dirty, you can use double-sided tape.
On a note: In order to fix the magazine tubes with a “herringbone”, it is not at all necessary to cut them, you can simply gently bend them, as shown in the photo.

No less beautiful look "flattened" tubules. If you “flatten” them a little, you get a very interesting shape, which is simply a sin not to beat (see photo). In this case, you cut short pieces and glue them at the cut point. .


It will be effective if you squeeze such tubes strongly and cut the resulting strips into small pieces. Butt-gluing them is not necessary (see a photo).


Newspaper and magazine "snails"
1. Take a sheet 8 times as wide as the intended strip. Fold it in half in the same way, then fold the edges to the middle and fold it in half again. Smooth each fold well so that your strip is as thin and neat as possible.
2. Now we twist the "snail". To do this, start winding the strip on a bamboo stick or knitting needle (you can also take a pencil or felt-tip pen, then you will get magazine “rings”). Do not forget to smear the inside of the strip with glue so that the “snail” does not spread.
3. After you have received the blank of the right size, cut off the rest of the strip and let the “snail” dry .


In the decor, both blanks of the same size or color look beautiful, as well as different ones. Turn on your fantasy! By the way, the strips do not have to be twisted, they can be used in this way, winding them in a spiral onto a cylindrical surface, for example, a vase, a round box or a candlestick. If desired, the finished composition can be painted or coated with a layer of varnish. And a few more words about the background. It can be just a white surface or a surface pasted over with magazine or newspaper pages.


Unusual panel of magazine strips
And finally, another very interesting and simple idea for a do-it-yourself panel. In this case, you do not need to twist the tubes or snails, just cut thin strips (you can use both color pages and black and white). You will need a frame with a passe-partout, preferably under glass, and two sheets of cardboard. On white cardboard the size of your frame, stick magazine strips at a small distance from each other. From the second sheet (it is better to take cardboard with an interesting texture), create a stencil. Now put the stencil on the background of the stripes, fix it - and under the frame. If it allows, it is better to put a sealant between the sheets of cardboard, then the picture will turn out to be three-dimensional .


It is unlikely that anyone will be left indifferent by homemade items decorated in such a simple, but very effective way. In addition, this is a great opportunity for creative self-expression and relaxation. Create beauty with your own hands with pleasure!
Sourcesa photo: www.craftstylish.com, papercreative.ru, biovi.ru, stranamasterov.ru.